 |
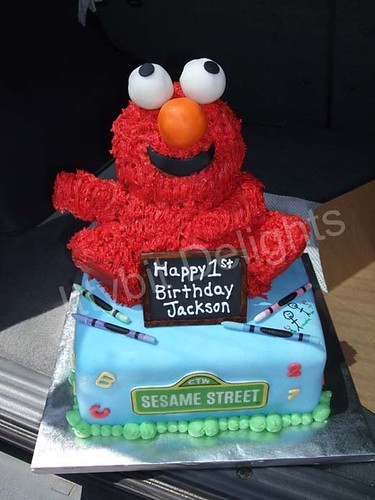
| Front view of Elmo 3-D cake |
 |
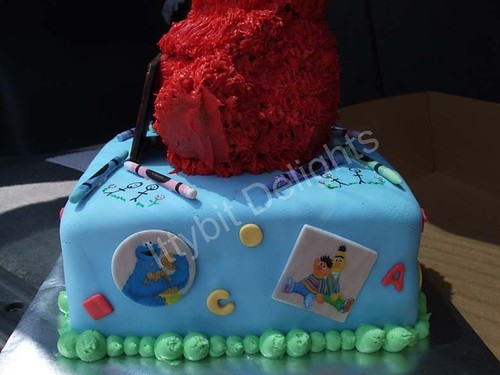
| Close up of handcrafted crayons |
 |
| Side view shot |
 |
| Sesame Street sign that was placed on the front of the cake |
The next cake in my 3-D collection is the Elmo cake. This was done for a family friend whose son was turning 1. This cake was a little more challenging and I will fill you in on why. The main body of Elmo needed to be attached to the base of the square cake on which it would be sitting on. I couldn't just use the basic thin dowels that would be used to stabilize a regular cake because they would just snap in half. Instead I needed to buy a dowel that was about a 1/2" inch thick. My husband helped me by sharpening one end and then screwing the other end of the dowel to the bottom of the cake board. In this case I needed to use a piece of plywood for the base to ensure that it wouldn't flex since this cake was heavier. Once the dowel was attached I could move on to the square cake itself. I went ahead and did what I needed to do as far as decorations went for prepping them. I tinted the fondant that would be covering the square cake with a light blue. I then used my small letter cookie cutters and shapes to cut out different colored fondant pieces that would be attached to the cake later on. Here's a tip: whenever you are attaching decorative pieces to a fondant covered cake it's better to use a little bit of water than frosting. Take a brush and dab it in some water then brush that onto the fondant piece then apply it to the cake. When you use frosting it's a bit more messier and it can ooze out from underneath the piece which you don't want.
Sugar art pieces- as you will see there were some images that I used on the sides and the front of the cake as well as the crayons. These were very simple to do but I suggest that you create them a few days in advance as it does take time to dry completely.
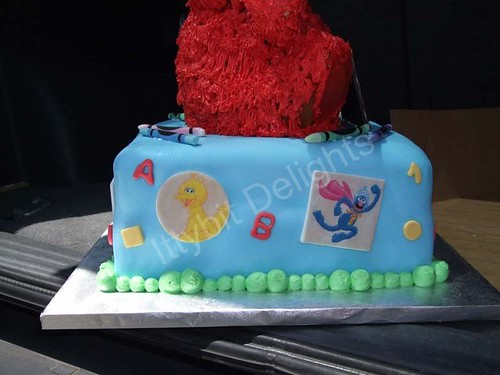
Character images- I saved these images on my computer then I re-sized these images in Photoshop and then printed them out on to NON-EDIBLE rice paper. Once they were printed out and cut out I applied them to circle and square shapes that I made a few days prior. All I did was mix some fondant and gumpaste together and allowed these pieces to dry so that it would become hard. Once these pieces had dried completely I again used my brush and little bit of water and attached the rice paper images to the different shapes. I then allowed the piece to dry completely. To attach these character images, instead of using the water technique, I made some royal icing. I took a knife and just spread the royal icing on the back and stuck the shape to the cake.
Crayola crayons- I simply made these using the combination of fondant and gumpaste and then tinting it to the colors that I would need. And the same way I created the rice paper characters I created the rice paper labels that wrapped around the crayons. I used a black edible art pen and drew little stick figures near the crayons.
Blackboard- this was all done in fondant and gumpaste. I mixed the two and then added black gel to get the main black board and let that dry completely. And for the wood frame all I did was take some white fondant and then trimmed it size. I attached those cut pieces with water to the black board and then used my fondant tool to give it that grain look. Once that was done I took some brown gel and painted it a bit to give it that finished wood look. I used royal icing to write the "Happy 1st Birthday Jackson."
Elmo- he was created using the teddy mold from Wilton. The body of the bear needed to be tweaked a bit and that was all. The ears needed to be removed and I needed to use a rice crispy treat for the arm that extended out on the side. I used medium sized Styrofoam balls for the eyes and nose. I cut out two small black fondant dots and attached to the eye balls.
 |
| Another side view |
 |
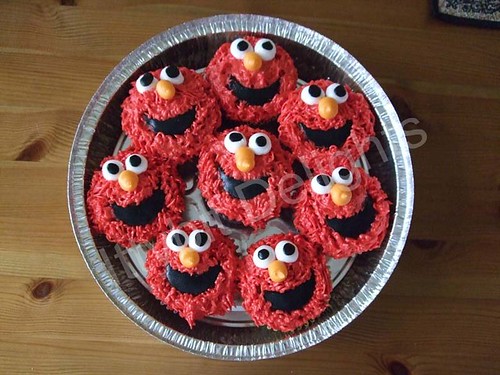
| Elmo Cuppies |
Before making Elmo come to life with his red fur we needed to attach him to the cake as well as to the base board which now had the large 1/2" dowel attached to it. First the cake. My husband and I carefully aligned the cake to make sure that it would be sitting on the cake board (which is covered with silver cake paper) correctly. At this point the cake had been covered with the blue fondant but NOT decorated yet. Once the square cake had been placed it was time to place Elmo. This was a bit tricky. Again we lined everything up to make sure he would be sitting straight. Here's another tip: the dowel did not go all the way up to the tip of the head. We measured prior to make sure that the dowel would go half up Elmo. Once we knew that he would be straight and center we went ahead and placed his body on the dowel. Beautiful!!! Now it was time to give Elmo some fur. I had already made some red frosting so my husband helped me out a great deal by piping Elmo's fur with the grass tip made by Wilton. In the meantime I attached all the decorations to the main cake and once that was done I piped the decorative ball boarder with some light green butter cream frosting. I also made a few cupcakes to go with the cake.
Until my next blog...happy caking!
Ittybit

No comments:
Post a Comment