Showing posts with label cupcakes. Show all posts

Wednesday, August 1, 2012

Carob Mint Cupcakes for Dogs

While shopping in Petco the other day I came across these carob mint cupcakes made for dogs. The box is titled "Gourmet Trails" and includes the name Doggy Delirious but when I visited the Doggy Delirious website it states "for more information visit "Wet Noses" website."  So I checked out "Wet Noses" and it appears that they sell some really good looking treats for dogs.  So I may have to order some because I'm sure they will be paw approved since these carob mint cupcakes already were, as you can tell by the second picture.   The day I bought these they also had some peanut butter cupcakes. 

The ingredients listed for these carob mint cupcakes includes: 
organic rye flour, eggs, canola oil, carob powder, ground peanuts, cane molasses, baking powder,. 

Icing: maltodextrins, yogurt blend [whey solids, yogurt powder (milk and yogurt culture)], corn starch, mint extract, guar gum, water, propylene glycol, FD&C yellow #5, caramel color, FD&C red #40, FD&C yellow #6, and FD&C blue #1.


Wednesday, August 3, 2011

TOH - Chocolate Zucchini Cupcakes

                                       Photo via Taste of Home

I've had zucchini dessert bread and that was pretty tasty.  So now imagine zucchini and chocolate combined.   My taste buds are going crazy just thinking about.  This recipe was submitted by: Carole Fraser - North York,  ON.  I can't wait to make these myself!   Click here for the recipe. 
Until my next blog....happy cupcake making!
Ittybit

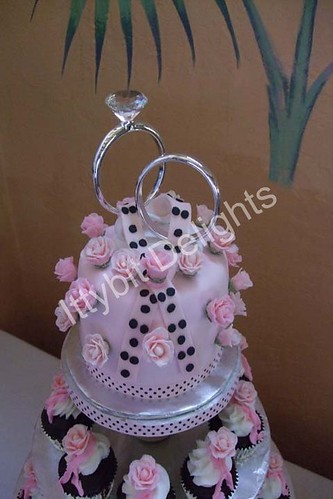
Pink and Black Themed Wedding Cake and Cuppies

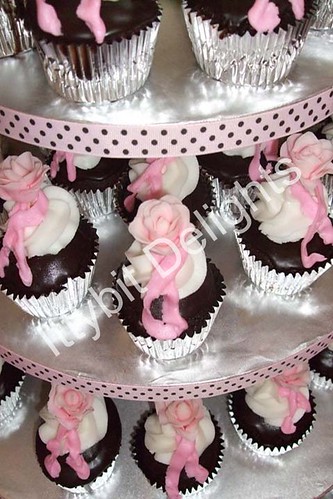
Pink and black wedding themed cuppies.
A close up shot of 6" inch topper cake.


Close up of cuppie with handcrafted pink fondant rose.


I created this wedding topper cake and cupcakes a few years ago for my mom's wedding.  It was a pink and black themed wedding and she really loved the style of fondant roses.  So my gift to her and her husband was their wedding cake and cupcakes.  Needless to say the bride and groom were very happy with the final outcome.

Wednesday, July 20, 2011

My Sister's Birthday

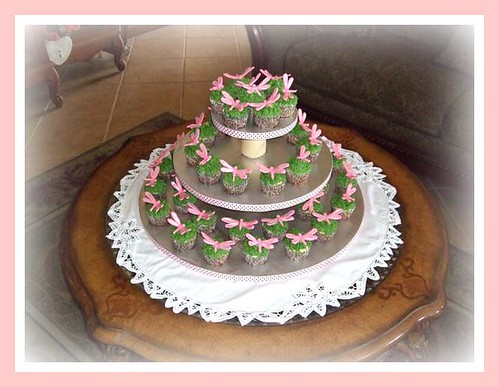
Full view of dragonfly cupcake tree
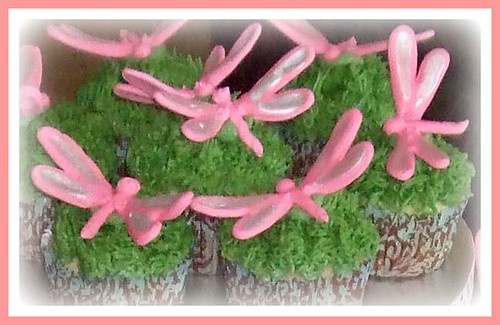
Close up shot of the dragonfly cuppies
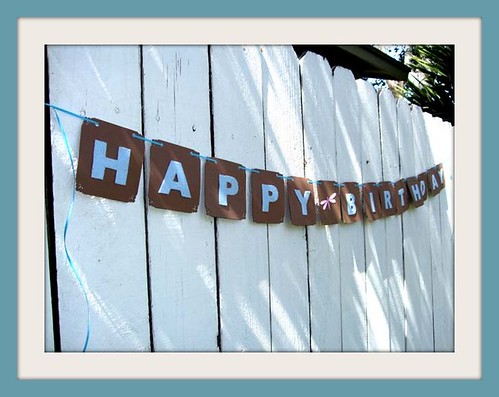
Handcrafted felt lettered birthday sign
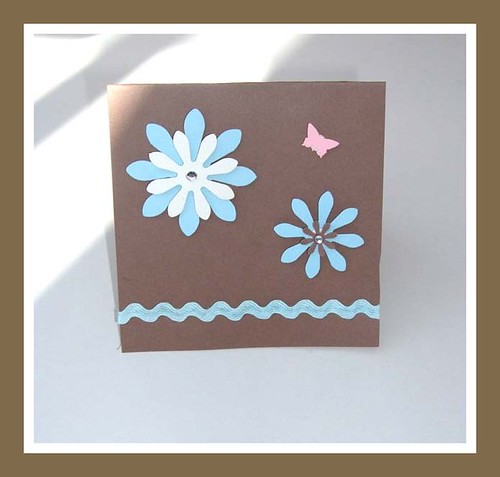
Handcrafted birthday card for my sister

Since my sister likes dragonflies I decided to design the cupcakes around dragonflies.  I also used the blue and brown color from the cupcake holders to create the party theme.  I wanted to create a one-of-a-kind birthday banner so I purchased some brown card stock and blue felt from Michael's.   I then simply threaded some thin light blue ribbon through punched holes in each corner of each card.   I then cut out a pink dragonfly and used that to place between the "happy" and "birthday."   I was very happy with how everything turned out and my sister was very surprised.  

As for the cupcakes I created all the dragonflies using royal icing. I first piped the head and then piped the body.  I let those dry over night.  Then I started working on the left side of the wings the next night so that they could completely dry.  I used some foil to prop them up so they would have a slight curve to them.  Then the next night I did the same thing when I created the right side of the wings.  I then propped up the right side as well.  Once everything was dried I used silver edible powder to created the shimmer on the winds.  I added a little bit of lemon extract to the silver edible powder.   I was also very happy with how the decorations came out. 

The party was a success as well as the dragonfly theme.   I also cut some large sized flowers using dark brown and blue construction paper to hang around the house as well as pink and silver dragonflies.  The birthday girl was certainly surprised and she enjoyed every moment...as she should. 

Until my next blog...happy crafting and baking. 
Ittybit

Wednesday, November 17, 2010

Pistachio Cupcakes With Rose Petal Flavored Buttercream Recipe - from Ittybit's Kitchen


These are some great tasting cupcakes.  I made these cupcakes awhile ago but I found the recipe on 52 cupcakes' blog.   It's titled "Week 39-Pistachio Cupcakes with Vanilla Cream Frosting." 

Preheat oven to 375 degrees F  (makes 18 standard cupcakes)

Here's the recipe: 
1 3/4 cups all-purpose flour
1 (3-1/2-ounce) package instant pistachio pudding mix
2/3 cup sugar
2 1/2 teaspoons baking powder 
1/2 teaspoon salt
3/4 cup miniature chocolate chips
2 eggs, beaten
1 1/2 cups milk
1/2 cup vegetable oil 
1 teaspoon vanilla extract
1 cup chopped pistachios

Directions: 
1. In a mixing bowl, add the first 5 ingredients; stir to combine. 
2. Add in the mini chocolate chips; stir to combine.
3. In another bowl, add the eggs, milk, oil, chopped pistachios, and vanilla;stir to combine.
4. Pour the liquid mixture into the dry mixture; stir until well mixed.
5. Fill paper-lined muffin cups 2/3 full.
6. Bake for 18-20 minutes or until pick comes out clean. 
7. Let cool in pan for 10 minutes, then transfer to wire rack to finish cooling. 

*Instead of using vanilla cream frosting I simply used pure rose extract that I purchased at Sur La Table and added a little to my butter cream frosting. I added a handcrafted sugar rose that I made out of fondant and gumpaste.

I really enjoyed these and plan on making them again.  :)

Happy Baking!

Saturday, November 13, 2010

Pumpkin Cupcakes - From Ittybit's Kitchen


Mmmmmm....pumpkin cupcakes.  What a tasty little treat.  I made these for my Church's Harvest Festival.  I took a basic white cake (from the box) used some orange gel to tint my white batter.  I made some butter cream frosting from scratch and tinted that green so I could use as the main frosting on my cupcakes. For the pumpkins I made them using krispy treats. While melting the marshmallows I added a few drops of orange gel and then once again in the process of adding the rice krispy's.  Once the rice krispy batter was ready I could start making the pumpkin ball.  This part was a little tricky plus I had to work fast so the rice krispy's wouldn't harden. I used shortening on my hands so the rice krispy treats wouldn't stick to my fingers.  For the stem part I took a piece of a tootsie roll and cut it in half. I then piped some leaves and vines to finish these pumpkins. 

Sunday, August 8, 2010

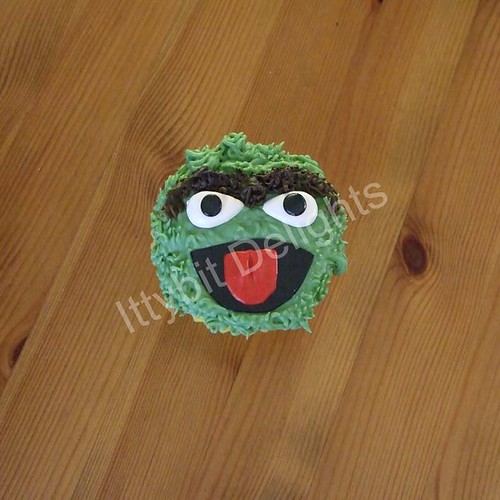
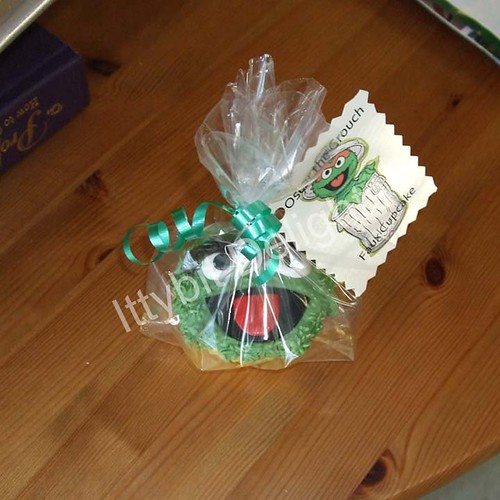
Faux Cupcakes


Here are some faux cupcakes that I did as gifts. I wanted to show how they looked both wrapped and unwrapped. I'm pretty sure you will recognize these two characters. No name introduction is necessary.

Wednesday, July 21, 2010

Sushirific!!!


This past weekend I made some birthday cupcakes for a friend. I made two types one of which are these fabulous sushi cupcakes and the others were some wonderful chocolate ganache dipped cupcakes. This post is all about the sushi cupcakes that were done. My husband and I actually thought of this idea while waiting for "Inception" (great movie by the way!) to start. So naturally my wheels started turning. So as soon as I got home I gathered all my ingredients and I went to work. Remember...when creating little masterpieces such as this one it does take time...so patience is definitely a virtue. I was truly happy with the outcome and so was my friend. I admit...I love seeing the reactions on the face of the person that this edible art piece has been designed for. I hope you enjoy as well. Until next time...