Showing posts with label Crafting. Show all posts

Thursday, July 21, 2011

Green and Pink French Fabric Memo Board

                             Handcrafted French Fabric Memo Board.

                                French Fabric Memo Board Installed.

                               Close up of hand painted wooden knob.

I needed some type of board to hang notes, ideas, pictures and things that mean a lot to me in my craft area.  So instead of hanging a bulletin board and painting it I remembered seeing a french fabric memo board from a DIY segment.  So I turned on my computer and did some research.  I'm a sucker for anything "PINK."  So what two great color combinations than green and pink!  So I made a quick run to Joann's and found the perfect green and found the perfect pink ribbon.  

A while back I had bought four wooden knobs from Lowe's with the idea that I would need them for a project similar to this down the road.  So I got to work painting the wooden knobs your basic white and then painting some simple pink flowers with little green leaves and vines.  To finish off my flower I decided to glue a clear flat rhinestone in the center.  I sprayed a clear coat of protective seal on all four.  I put these to the side and started on the board.  With the extra help of my wonderful hubs he helped me a little with the stapling and the layout of the ribbon.   Needless to say I was so excited on how the board looked at that point and the knobs hadn't even been attached!   But once the knobs were attached I absolutely loved it. 

Once my hubs had installed in my craft area I couldn't help but just stand back and look at it. The final size of this fabric board is 15" tall x 46 1/2" long.

Until my next blog...happy crafting!
Ittybit

Wednesday, July 20, 2011

My Sister's Birthday

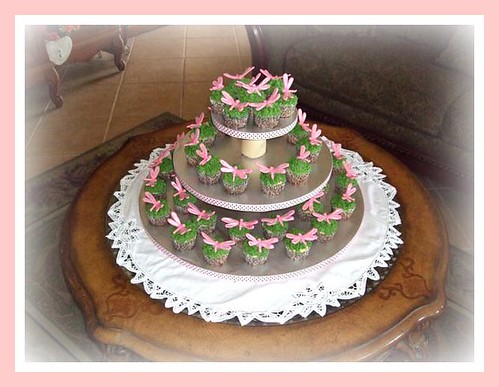
Full view of dragonfly cupcake tree
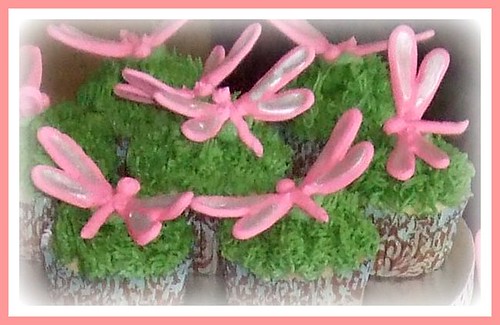
Close up shot of the dragonfly cuppies
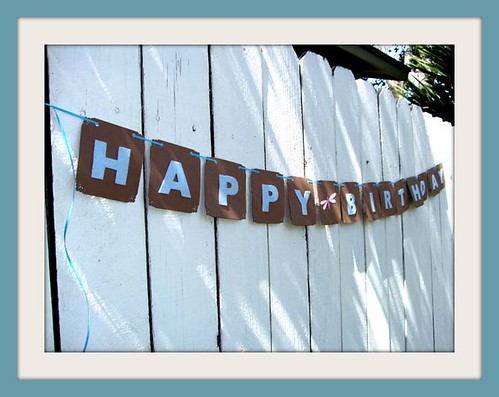
Handcrafted felt lettered birthday sign
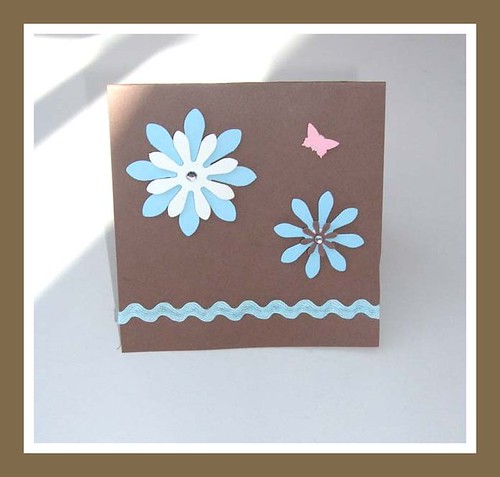
Handcrafted birthday card for my sister

Since my sister likes dragonflies I decided to design the cupcakes around dragonflies.  I also used the blue and brown color from the cupcake holders to create the party theme.  I wanted to create a one-of-a-kind birthday banner so I purchased some brown card stock and blue felt from Michael's.   I then simply threaded some thin light blue ribbon through punched holes in each corner of each card.   I then cut out a pink dragonfly and used that to place between the "happy" and "birthday."   I was very happy with how everything turned out and my sister was very surprised.  

As for the cupcakes I created all the dragonflies using royal icing. I first piped the head and then piped the body.  I let those dry over night.  Then I started working on the left side of the wings the next night so that they could completely dry.  I used some foil to prop them up so they would have a slight curve to them.  Then the next night I did the same thing when I created the right side of the wings.  I then propped up the right side as well.  Once everything was dried I used silver edible powder to created the shimmer on the winds.  I added a little bit of lemon extract to the silver edible powder.   I was also very happy with how the decorations came out. 

The party was a success as well as the dragonfly theme.   I also cut some large sized flowers using dark brown and blue construction paper to hang around the house as well as pink and silver dragonflies.  The birthday girl was certainly surprised and she enjoyed every moment...as she should. 

Until my next blog...happy crafting and baking. 
Ittybit

Saturday, May 7, 2011

Mother's Day Surprises - Crafting

Handcrafted Goody bags
Contents inside each goody bag.

Here are some Happy Mother's Day goody bags that I did.

My nana's goody bag on the left contained one handcrafted plumeria scented soap with one lip balm from Orangethyme

My sister's goody bag (center) contained one handcrafted lavender scented soap with a bunch of lips balms from Orangethyme along with a few handcrafted earring sets. 

My grandma's (husband's side) goody bag on the right contained one handcrafted apple scented soap.

I enjoy making handcrafted items for holidays and birthdays.  Simply because they are one-of-a-kind and I can also customize for that person.  I also enjoy seeing their face just light up!  :)

Until my next blog...Happy Crafting!
Ittybit

Wednesday, February 23, 2011

Valentine's Day Felted Goody Bags - Crafting


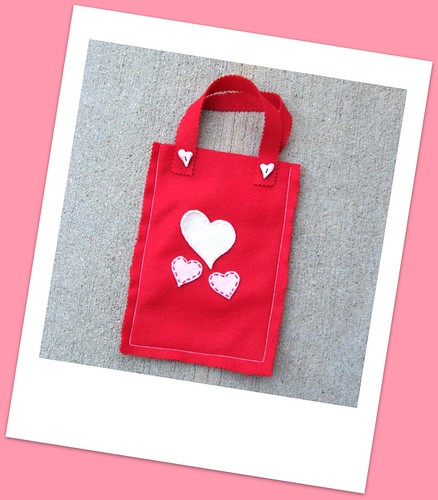
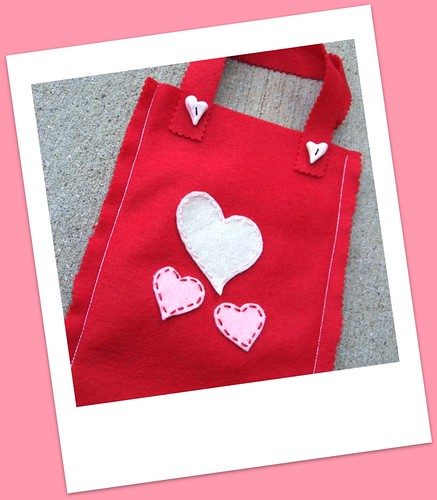
Handcrafted Valentine's Day felted goody bags.  I needed to make a few fun bags for some family relatives so we could put some Valentine's Day goodies inside.  I used the following: 

Red felt
Light pink felt
Creme felt
Pink yarn
Red yarn
Handcrafted polymer clay hearts

I took two 8 1/2 x 11" pieces of red felt and cut them down to 2- 9x6's. I sewed the two pieces together leaving about a 1/2" on the three sides.  After I sewed them together I used my fabric zig-zag patterned scissors to give a finishing touch.  I did the same for the handles.  I cut out three heart shapes.  One large creme colored and two small light pink ones.  I used a thick pink yarn as an outline stitch for the creme colored heart and red yarn for the two smaller pink hearts. I used fabric tac to attach the hearts and the handles.  All that was left was attach the handcrafted polymer clay hearts with some red colored thread. 

Until my next blog....Happy Crafting
Ittybit

Saturday, February 19, 2011

Family Inspired "Fighting Cancer" Lapel Pins and Bracelets

"Fighting Cancer" Bracelets

                                    "Fighting Cancer" Lapel Pins 

These two pieces were inspired for two of my family members.  I wanted to handcraft something not only for the women but for the guys as well that we could all wear to support two very important people in our lives. 

I've lost friends from this ugly disease but when it hits a direct family member it's a whole new game. The last week and a half has been tough.  One reason why I haven't blogged.  We've won one battle and we have one more to go.  I keep telling myself that God is in control with this situation.

Until my next blog...
Ittybit

Sunday, January 9, 2011

Handcrafted Christmas Tree Cards

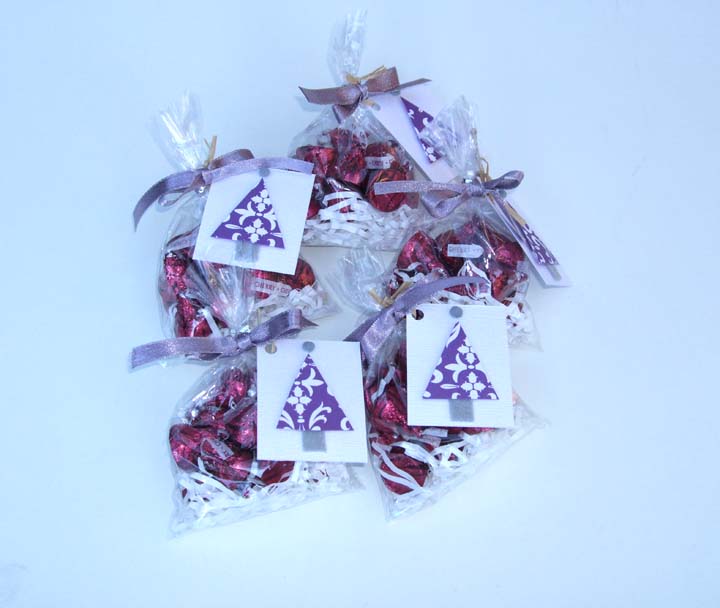
                                      Lots of goodies with Christmas Tree cards.

                                              Handcrafted Christmas Tree cards. 

                                                            Supplies used
                                     

I had fun creating these cards on my own. 

I used the following supplies: 
Silver scrap booking paper
Light purple scrap booking paper (not shown)
Purple swirly decorative scrap booking paper
Gray felt
White pom poms
Glue (Elmer's and a glue stick)
Silver paint (not shown)
Plaid Mini Pop Dots (peel and stick type) 

When I purchased the purple swirly paper I noticed it was a bit flimsy.  So I decided to get some light purple paper which has the same thickness as card stock and used a glue stick to adhere each piece together.   Now I had the thickness  I needed.  Next  I made a triangular template for both the small and large Christmas Trees.  I then traced a bunch of small and large trees onto the back of the light purple paper that I had just glued (using the glue stick not the Elmer's) to the swirly purple paper.  Then cut all those out.  Once I had a field of trees I set those to the side and started to cut the silver scrap booking paper to the sizes that I would need to accommodate for each large and small tree.  Once my cards were done I set those to the side and then started to cut out little gray felt rectangles for each tree.  Once I had my gray rectangles felt shapes done I put those to the side and then started to work on my pom poms with the silver paint.  I pretty much did the same thing that I did for the wreaths project.  I squeezed some silver paint into a plastic cup and rolled the white pom poms in them with my fingers until they were all coated.   I let the pom poms dry overnight.  Now I'm ready to assemble.  I started out by gluing (with Elmer's) each gray felt piece first.  Once I had all the gray felt rectangles glued I then started on my tress. I wanted to glue my gray pieces first so this would give me a better idea on where to position the tree.  I placed three mini pop dots (the peel and stick type) on each corner of the trees then positioned it onto the card.  I set all these to the side and the next day I used some glue (Elmer's) to attach the painted pom poms.  Viola!  Cards are finished.

These didn't take me long at all to do.  Plus they are OOAK (one of a kind) and each person that received one really enjoyed it!  

Happy Crafting, 
Ittybit
Until my next blog...

Thursday, December 30, 2010

JoAnn's Fabric Visit


I enjoy shopping at JoAnn's Fabrics as much as I enjoy shopping at Michael's Crafts.   I just get lost in the sea of fabric, thred, buttons and the ideas that just keep streaming through my head that sometimes I have a complete overload.  WHEW!!  So needless to say it's always so hard for me to leave either one of these stores without something in hand.  What's a crafter to do?  So when I was in JoAnn's the other day I found these really fun fabric quarters.  I have some ideas for how I will use them.   Stay tuned to see the finished products. 

Ittybit

Wednesday, December 29, 2010

Handcrafted Christmas Goody Bag - Crafting Project

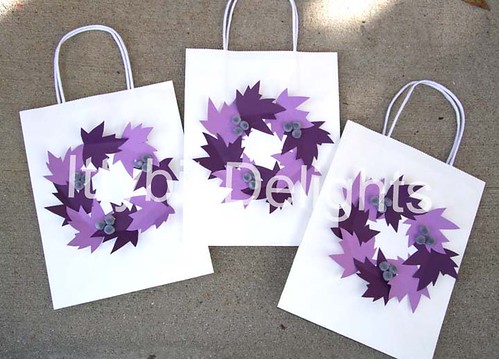
Finished handcrafted Christmas goody bags. 

                                          Lots and lots of purple colored leaves.

                                        Supplies that were used to create the bags.


WHEW!!!  Boy, did I stay busy over the Christmas season.  I had a lot of handcrafted projects that I did for family and friends that I did this year and did little baking.   But all-in-all everything turned out great.   So here's the start of some of the projects that I did that I wanted to share.  My handcrafted Christmas goody bags.

I decided to pull out the scrap booking paper, white paper bags, glue, white pom-poms, silver paint (not pictured) and make my own leaf template out of card stock to create my own Christmas goody bags this year.  This was a simple project and I would have to say that cutting the leaves is what took some time.  I took a black fine tip sharpie pen and traced all the leaves on to both the dark and light colored purple paper. I then started to cut each one out.  Once I had all of them cut I put those to the side. I then took the white pom-poms (my fingers got a bit dirty using this technique) and rolled them around in a cup that had some silver paint squeezed in to it.   I laid them out onto a paper towel so they could dry overnight.   To fold the leaves in half I used my flat metal clay cutting tool which made the folding so much easier.   I placed some glue on one of the flat sides of the leaves and attached it to the bag.  I let the leaves dry overnight.   I then dabbed some glue on each silver painted pom-pom and attached a group of three on different areas of the leaves.  I was very pleased with the final outcome of the project.

Happy Crafting,
Ittybit

Until my next blog post...

Monday, November 1, 2010

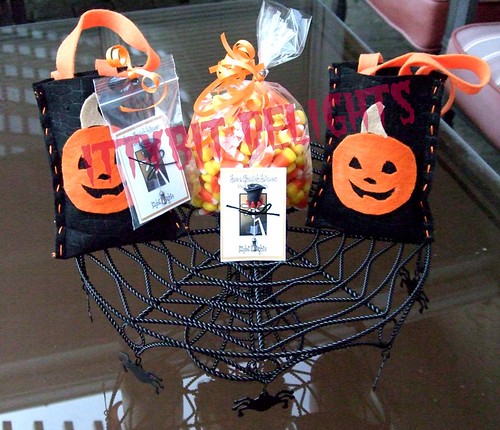
Handcrafted Halloween felted goody bags & black rose lapel pins

I wanted to hand out some candy corn to some friends but didn't want to deliver them in just any cello-bag with a handcrafted card. It needed something. So I decided to design my own felted goody bag and place the little cello-bag inside. I used a basic black felt for the main bag, 2 thin orange strips for the handles and some orange embossing string for the side stiching. Viola! But it was missing a final piece....

But of course...a black rose. So I got to work in my little studio and I handcrafted a few of these roses and attached them as a final touch to my felted goody bags. They each loved their little gifts.

I'm currently in the process of designing one for Christmas to hold my Christmas present lapel pin which will be for sale soon in my Etsy shop. So stay tuned.

Bag size: 4 1/2" w x 6" h

Sunday, October 24, 2010

Fun Little Handmade Bon Bon Soaps

All packaged up and ready to go!

Have I mentioned that I love soaps?? I absolutely enjoy making great smelling soaps and packaging them up nice and pretty for gift giving. I enjoyed making these little bon bon soaps for my friends as gifts and they accepted them with great big smiles.

Scents included were pear berry (green), lavender (light purple), honey almond (peach) and plumeria (white).

Thursday, October 14, 2010

Wooden Art


I enjoy decorating unfinished wooden trinket boxes. You can do so much to them. You can add embellishments, decoupage and paint them. And that's just the start. I bought my little wooden trinket box at my local Michael's crafts store. I painted it a light blue and added little light pink roses to it. I decided the top needed a little something. So I handcrafted some little roses out of clay and filled it with some resin. To finish the inside off I cut some pieces of pink felt and glued them to the inside of the wooden box. Viola! A pretty little wooden box.

Monday, October 11, 2010

Handmade Scented Candles

This is a pear-berry scented large size candle. I decorated the front using polymer clay. I then attached my handmade gift tag and attached a silk rose to finish this wonderful gift off.

These smaller candles were fun to make. I made two peach and a pear-berry. I handcrafted the reindeer out of polymer clay. Each has it's own gift tag and I attached a silk rose to each one. All ready for their new homes.


I absolutely love scented candles. I must admit I enjoy making my own when time permits. I can scent and color them however I choose. I enjoy giving them as gifts to family and friends.

Sunday, August 8, 2010

Faux Cupcakes


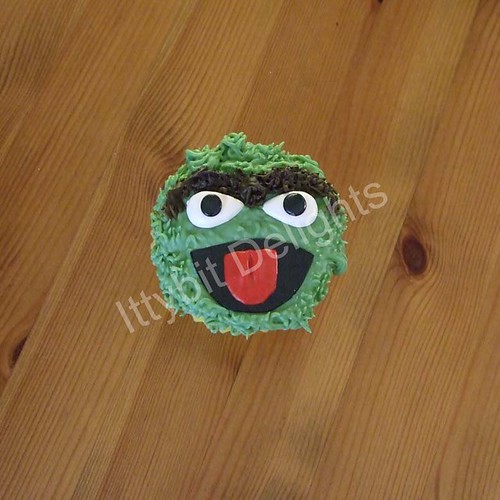
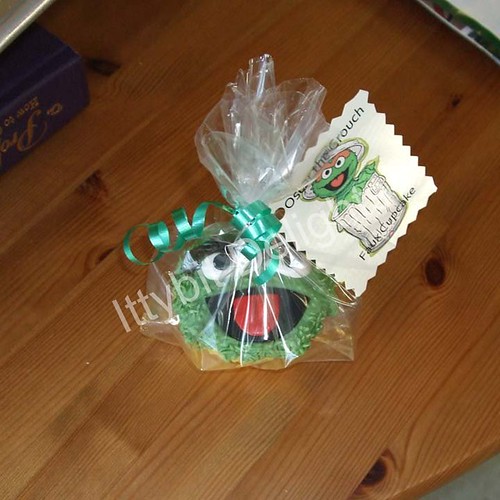
Here are some faux cupcakes that I did as gifts. I wanted to show how they looked both wrapped and unwrapped. I'm pretty sure you will recognize these two characters. No name introduction is necessary.

Monday, July 26, 2010

Handmade Soaps

Decorated with a thin cut piece of translucent paper, scrap-booking
flower with a colored brad and finished with a handmade label.


Flower and dragonfly imprints were done by laying a flat
decorative rubber
stamp to the inside bottom of the mold
facing up and pouring the soap mixture
on top.


Who doesn't like a soap that smells absolutely divine? I just love smelling aromatic scented soaps. I especially love making my own because I can make them any scent, color and add my own little special touch to the packaging once they are ready to go to a new home. I like being able to melt, color, scent and pour my soaps. These two soaps were done as a gift for a friend. I made the pearberry lightly colored with green and the lavender is done as a two tone.


Saturday, July 17, 2010

Smells sew good!


I absolutely the loved the patterns on these silk fabrics. So I decided to make rose scented sachet bags out of them. As a finishing touch I tied a pink sheer ribbon and attached a silver handmade polymer disc that I imprinted with a stamp.